Session 11 - Non-round cells or other objects#
Goal: learn how to use a pixel classifier to detect oddly shaped cells not well captured by other methods
YouTube video walkthrough: Session 11
Myeloid cells are notoriously difficult to segment. They come in a wide variety of shapes and sizes, have processes stuck between other cells, and are not centered on a single nucleus. Here is an example of a single myeloid cell in the tonsil that InstanSeg segmented into 6 separate cells (even though it did a great job on all the rest of the tonsil!)
To properly segment cells like these, we will need to use a pixel classifier combined with an object classifier.
1. Train a pixel classifier for Tingible Body Macrophages#
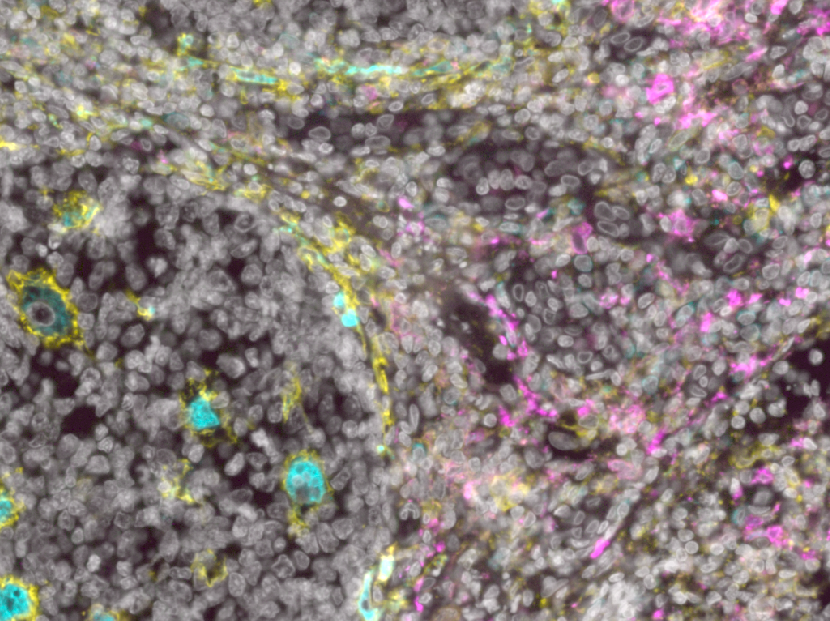
Open Tonsil_flip.ome.tif. We do not need the HE overlay for this step.
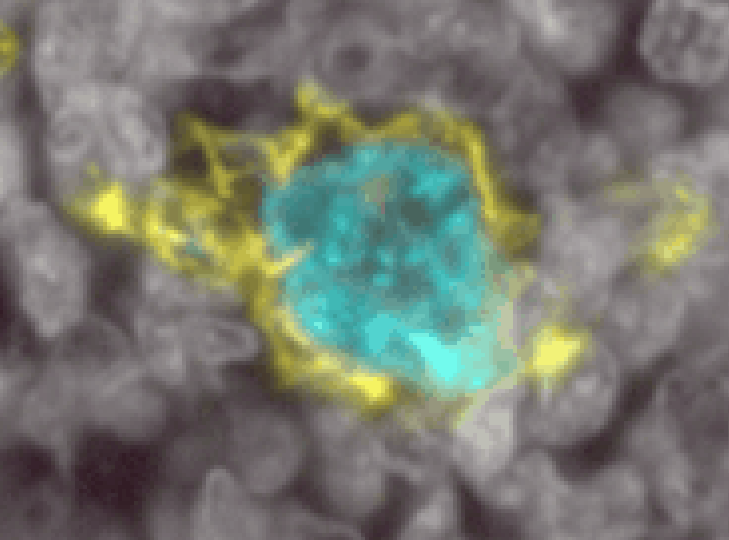
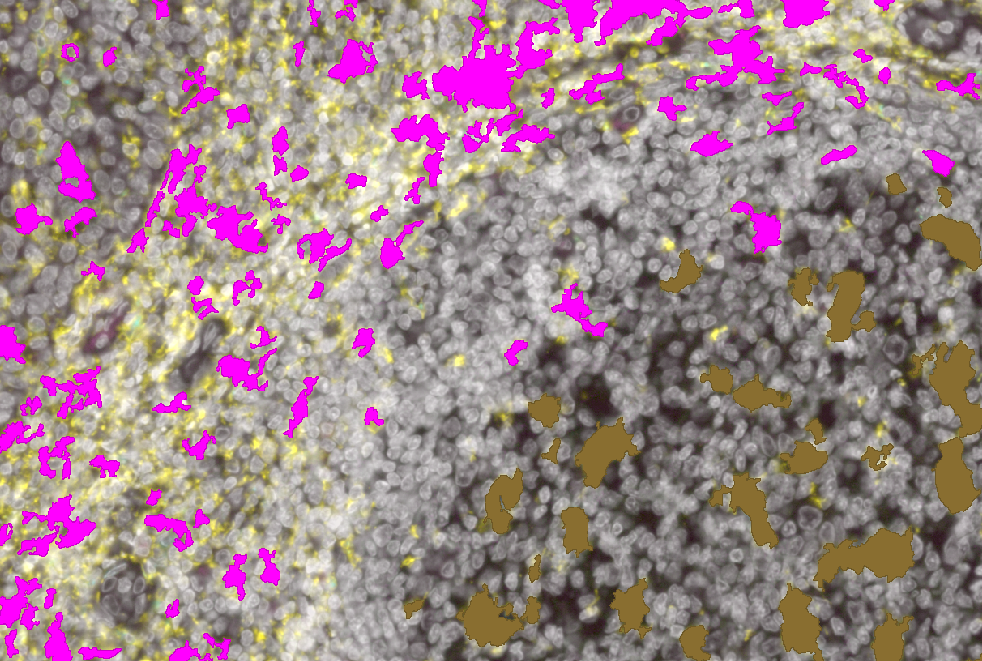
Turn on the Hoechst (return to white), CD11c, CD68, and CD163 channels. Pick a combination of channel colors that lets you see the 3 markers. Name this display setting “Myeloid”
Clean up the class list.
In the Annotation tab, right click on the class list >
Reset to default classesAdd the class “TBMacs”
Annotate examples of TBMacs (blue CD68+ and yellow CD11c+). Use Ignore* for the background class.
Use the POLYLINE TOOL for precision

Make sure you provide TBMacs examples of both the cell border (CD11c+) and cell cytoplasm (CD68+)
Focus a lot on the thin/dim cell arms and the edges of the cells
When you have a classifier you are satisfied with, save it as TBMacs. If you are unable to get a reasonable classifier in time, download “Proj2- Overlay and Classifiers” from the BackUp Projects folder and use the one already there.
2. Create Detections from Pixel Classifier#
Save the file. Duplicate the image, saving the new copy as “TBMac training”
Delete all annotations.
Create a full image annotation.
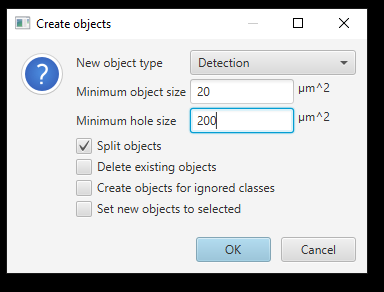
Objects > Annotations > Create full image annotationor Ctrl+Shift+A (⌘+Shift+A on Mac)In the Pixel classifier window, click Create objects
Parent Objects: Selected Object/Current Selection
Use these settings:
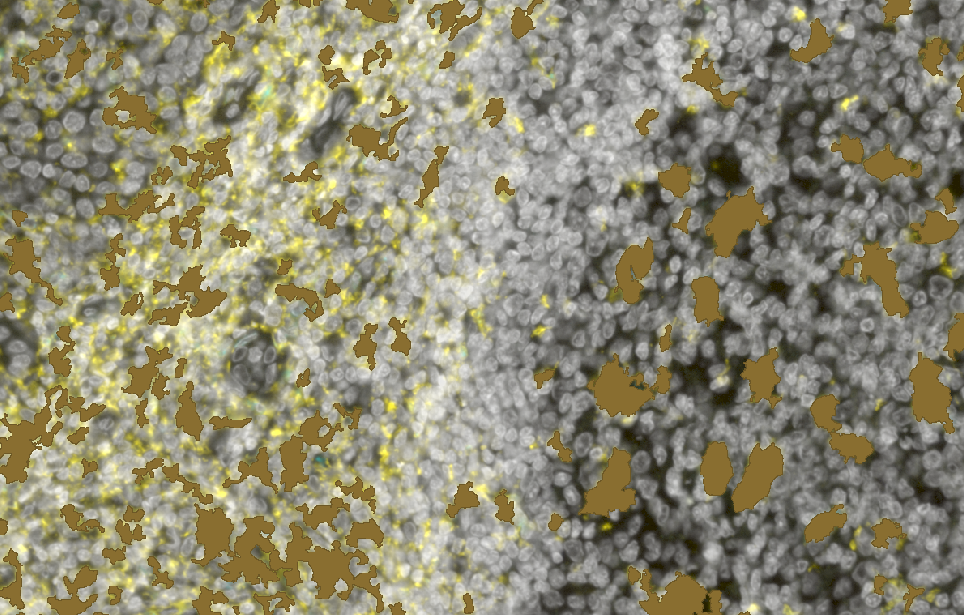
Close the Pixel classifier window. You should now see ~thousands of potential TBMac objects, including both the cells of interest and other CD11c+ cells that are not tingible body macrophages.
Save the file!
3. Use an object classifier to identify the cells of interest#
We are going to use an object classifier to separate the detection objects that represent true TBMacs from other myeloid cells. This is similar to the cell classification we did in Session 6, but the detections start with no measurements, so we’ll have to create some.
Select the cells:
Objects > Select > Select all detectionsor press Ctrl+Alt+D (⌘+⌥+D on Mac)Analyze > Calculate Features > Add shape featuresLeave everything checked and hit Apply
Analyze > Calculate Features > Add intensity features. Suggested features:Pixel size: 0.65 um
Channels: Hoechst, AF1, CD11c, CD68, CD163, CD45, Vimentin
Features: Mean, Standard deviation, Min & Max
Then click Run
Select the full image rectange.
Analyze > Calculate Features > Add smoothed featuresRadius (FWHM): 100 um
As in Session 6, train an object classifier. Use the classes TBMac and Other. Remember to create annotations that include the centroid.
Remember to choose only the useful features!
Save the classifier as “TBMacs_obj”
Clean up.
Save the file!
Duplicate the image as “TBMacs_obj training”
Delete all of the training annotatinons