Session 7- More Difficult Classifiers (pt2)#
Goal: Learn how to classify cells in more difficult cases requiring new measurements and feature selection
YouTube video walkthrough: Session 7
1. Preparation#
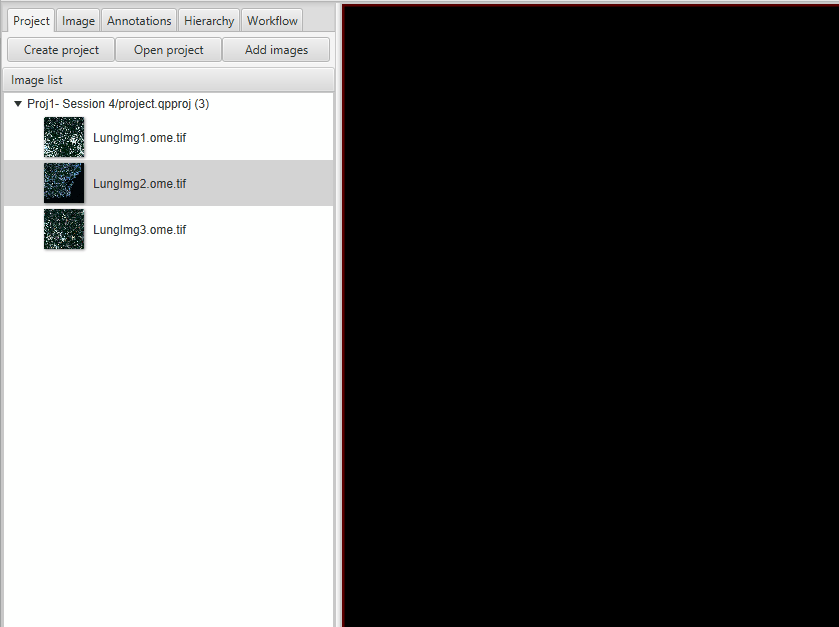
Load your project from yesterday with the CD45 classifier. If you did not finish the classifier, you can download and open “Proj1 - Session 7” from the Backup Projects folder. This has all of the cells, measurements, annotations, and classifiers we made yesterday.
Immediately save a copy of the project. We will delete some cells and the classifier training annotations and want to keep the option of recalling them later.
Go to your project folder, go one level up, and then copy-paste the entire project.
Name the new copy “V1_InstanSeg_All” or similar. When saving copies of projects like this, it is important to give it a meaningful name. I recommend including a version number, date, and short identifying information. RESIST THE URGE to leave it as “- Copy”. This is an actual example of one study’s organizational scheme on my computer. I came to regret this immensely - do better than I did.
In each image, clear the training data and unneeded cells.
Delete the CD45 and Ignore* training annotations, by selecting the first annotation, holding shift, selecting the last, then click Delete.
Delete the CD45- cells, which have no class (called “None” in the class list.) In the class list in the Annotation tab, right click on None > Select objects by classification > Delete Deleting the CD45- cells has two purposes. It reduces the size of the project data, allowing all future steps to proceed faster. It also means that when we’re training for subsets below, we can focus the classifier on CD45+ cells and don’t have to worry about training it to recognize non-immune cells.
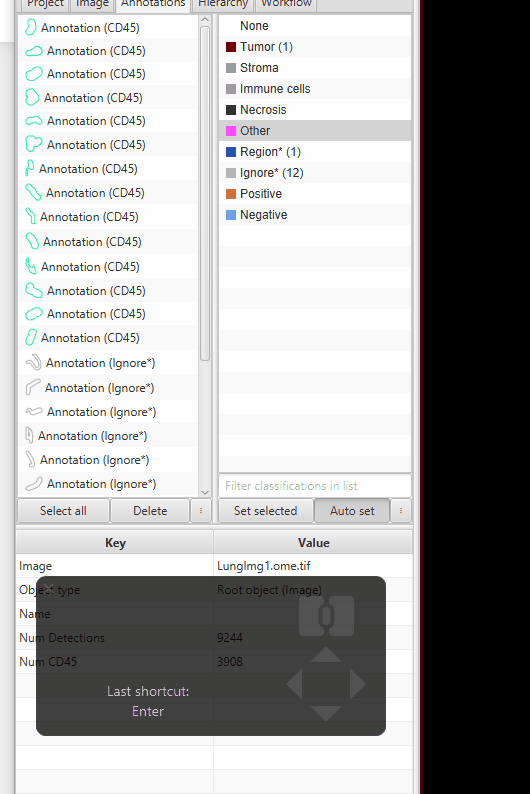
The tumor annotation will be useful later, but for now it is visually distracting. To hide it without deleting it, select the Tumor class in the Annotation tab and press Space Bar.
2. Training classifiers for T cell subsets#
We now have a project with the full tissue region, the tumor region, and the CD45-bright leukocytes segmented. From here we are going to separate the CD45s into subsets.
First, let’s add the measurements will we need for the classifiers for today. We’re eventually going to classify based on CD4, CD8, PD1, FoxP3. Let’s add those measurements to the cells- but not just mean intensity, include StDev, Min/Max, and Haralick features.
Objects > Select > Select detections > Select cellsAnalyze > Calculate features > Add intensity featuresSelect these options and then click Run and then OK in the next popup:
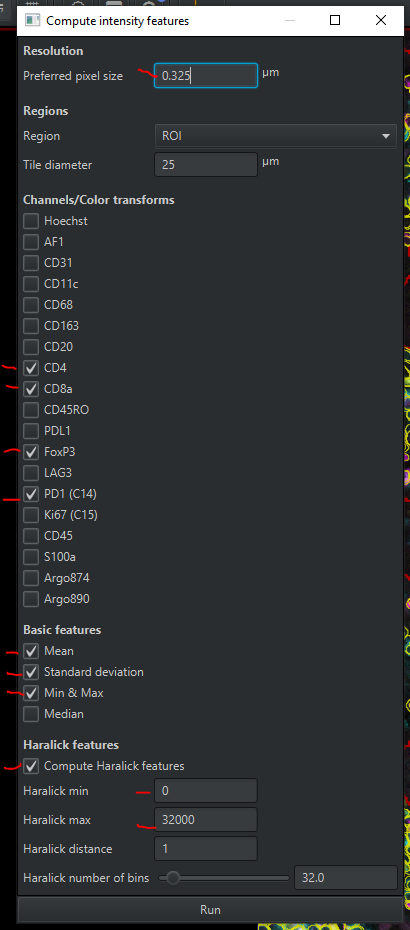
You now have ~73 measurements for each cell. Save the file!
Create a display setting that shows CD4 and CD8 in contrasting colors. Save it.
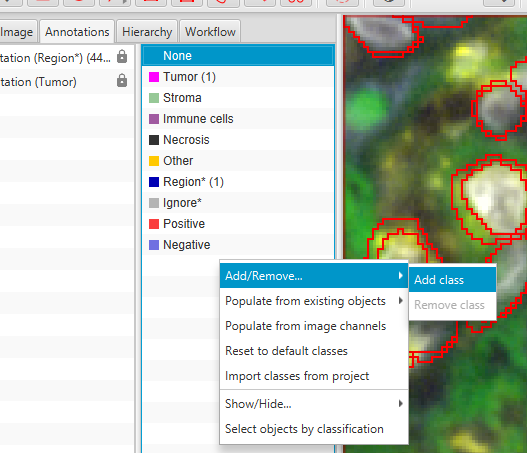
Add 2 new classes to your Annotations tab: ‘CD4’ and ‘CD8’.
Right click > Add/remove > Add class.
If your display is still overwhelming, I recommend you show only cell boundaries. Anywhere on the image
right click > Cells > Cell boundaries onlyAnnotate examples of CD4, CD8, and double negative cells.
For the negative cells, use the ‘Ignore*’ class
Use the brush or Points tool to annotate.
Particularly focus on cells that are neighboring different cell types- these are the most challenging for the classifier and require the most human-annotated example data!
Annotations only matter if they are over segmented objects. If a cell was deleted in step 1, it is gone now and cannot be classified or used as training.
When you’ve gotten a bunch of examples of each class (CD4, CD8, and Ignore*),
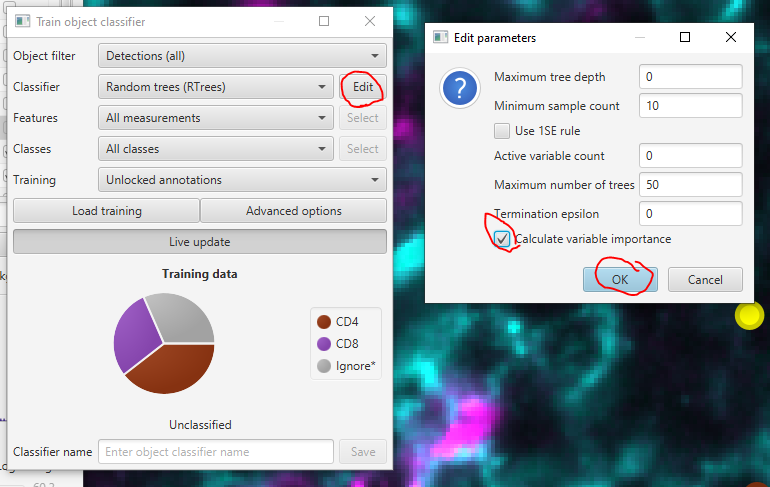
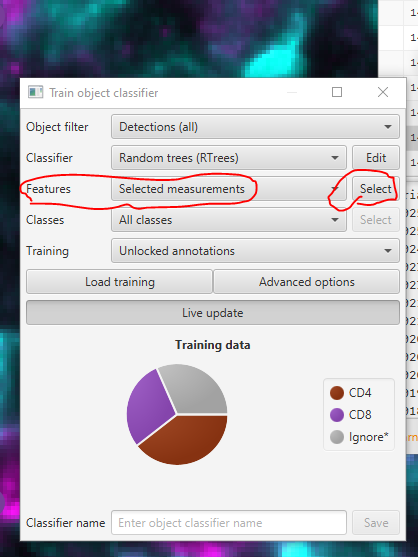
Classify > Object classification > Train object classifier. Hit Live update .View the feature weights.
Turn on weight calculation by clicking Edit next to the ‘Random Trees (RTrees)” dropdown. Then check Calculate variable importance and clicking OK
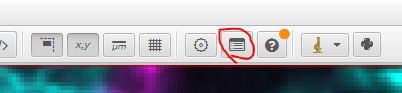
Show the log
The second from the last line in the Log will be the list of feature weights. Click on it to view them in the bottom window.
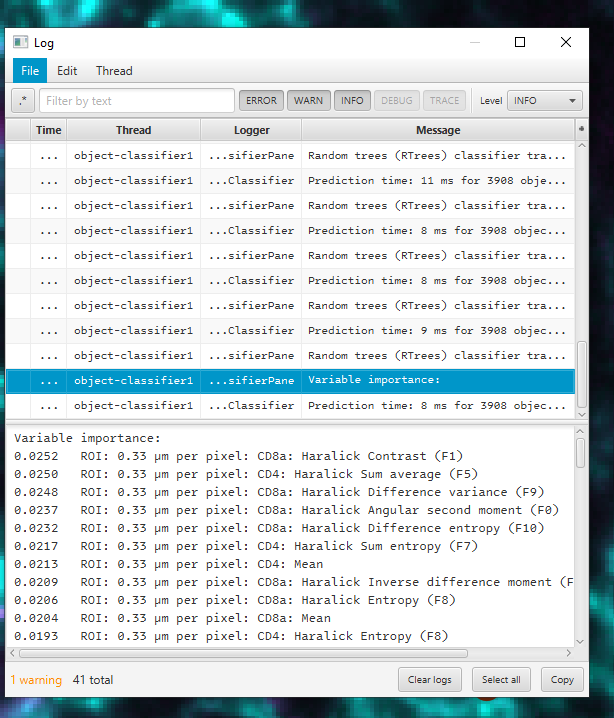
The top of the list (largest numbers) are the features being weighted most heavily. The bottom are the least useful. We want the classifier to focus on the meaningful features, and not those that are mostly random/noise/irrelevant/biasing.
Next we will remove features that are distracting the classifier. In this case, that is all measurements using the PD1, FoxP3, and S100a channels.
In the “Train object classifier” window, go to the Features dropdown and select “Selected measurements” then click Select
Click Select all
Type “PD1” in the search bar. Click Select None
Repeat for FoxP3 and S100a.
You MUST clear the search bar when you’re done. After you clear the search bar, click Apply
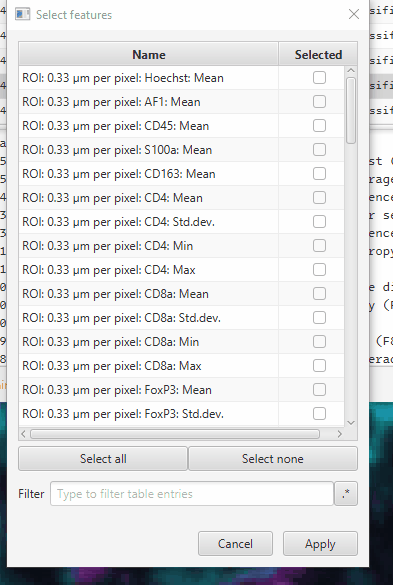
An alternative is to use the .* button to use regular expressions. You can instead use ^(?!.*CD). to search for every entry that does not have CD in it - which should be your FoxP3, S100a, and PD1 measurements. You will need to re-enable the Hoechst and AF channel measurements at the top if you do this. Creating regular expressions is one way to make use of chatbots, as they can be very convoluted to work with from memory!
In the log, there will be a new feature weight list. The relevant features will be weighted more heavily. This is a good “sanity check” on your classifier
Try removing various features from the classifier to see how it affects the results. Is your accuracy better or worse with the Haralick features?
Iterate until you’re mostly satisfied with the CD4 and CD8 calls. Then, save the classifier as “CD4_CD8”
Save the file!
Notes#
In a real project, you should train on multiple images. Today, for time’s sake, we will focus on a single image. To review how to include multiple sets of training data, see here.
Want to learn even more about getting creative measurements to identify the cells you care about? See this Youtube video from 2023.
3. Classify on T cell activation state markers#
PD1#
Save the file again, just because. Then, duplicate the image, including the data file, and name it “CD4_CD8 training”
We will now reset the image to begin training a new classifier
Delete the training annotations. This time you cannot use the “Select objects by classification” function, because you will end up deleting the cells. Instead, just select the CD4, CD8, and Ignore* annotations (Not the classification - the annotations!) in the left side of the Annotations tab and press Delete. Save the file.
Close the “Train object classifier” window.
Turn off the CD4 and CD8 channels in the display settings. Turn on the PD1 channel and set the display settings such that you can see dim cells.
Create a PD1 class in the Annotations tab.
Repeat the above steps to train a PD1 classifier. Annotate examples of PD1 and Ignore* cells, select features, iterate.
Many cells are dim. YOU must decide what is “positive enough” to count. QuPath can learn a consistent set of rules from your training examples, but it cannot decide for you what is real signal.
Save the classifier as “PD1”.
FoxP3#
Save the image file. Then Duplicate it and name it “PD1 training”.
Reset the image as Step 2 above.
Make a FoxP3 class and turn on the FoxP3 channel.
Create a single measurement classifier using the FoxP3 mean intensity (“ROI: 0.33 µm per pixel: FoxP3: Mean”)
If you select “FoxP3” in the channel filter, QuPath will automatically fill in the class name (if it exists), classifier name, and suggest the mean intensity measurement.
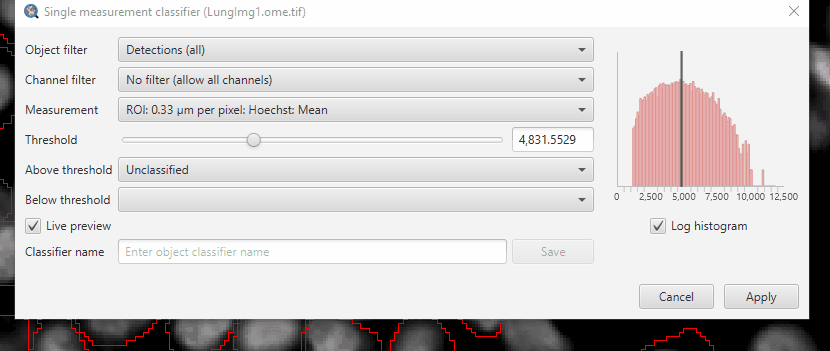
Adjust the threshold until you separate the FoxP3+ cells from the negative.
We now have 3 separate classifiers: To identify CD4 or CD8 cells, to identify PD1+/- cells and FoxP3+/- cells. We’ll combine these next.