Session 10 - Combining Images#
Goal 1: Learn how to work with extensions in QuPath
Goal 2: Learn how to combine 2 images of the same section to get more information
Because it’s open-source and popular, many people within the QuPath community write additional functionality for QuPath in the form of extension that can be downloaded separately. Let’s try installing one of my favorites- WarpyImageCombiner. This comes from the BioImaging and Optics Platform through the EPFL (École Polytechnique Fédérale de Lausanne) in Switzerland.
YouTube video walkthrough: Session 10
1. Setting up Warpy (one time setup)#
NOTE: Extension installation is different in the final 0.6.0 release!#
Use the Extension Manager instead of downloading individual .jar files. Get Warpy from the BIOP extension catalog. The instructions below are ONLY valid for 0.6.0-rc3.
Download the extension#
Go to the Biop Github page.
Click the drop down next to Assets
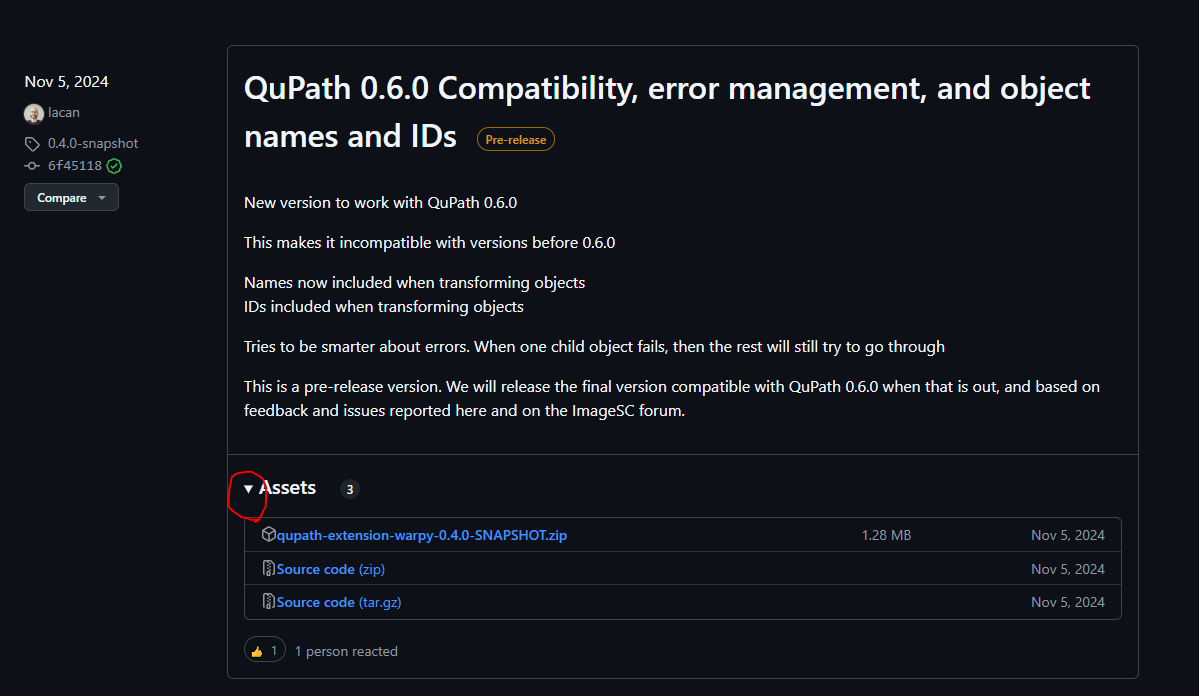
Download “qupath-extension-warpy-0.4.0-SNAPSHOT.zip”
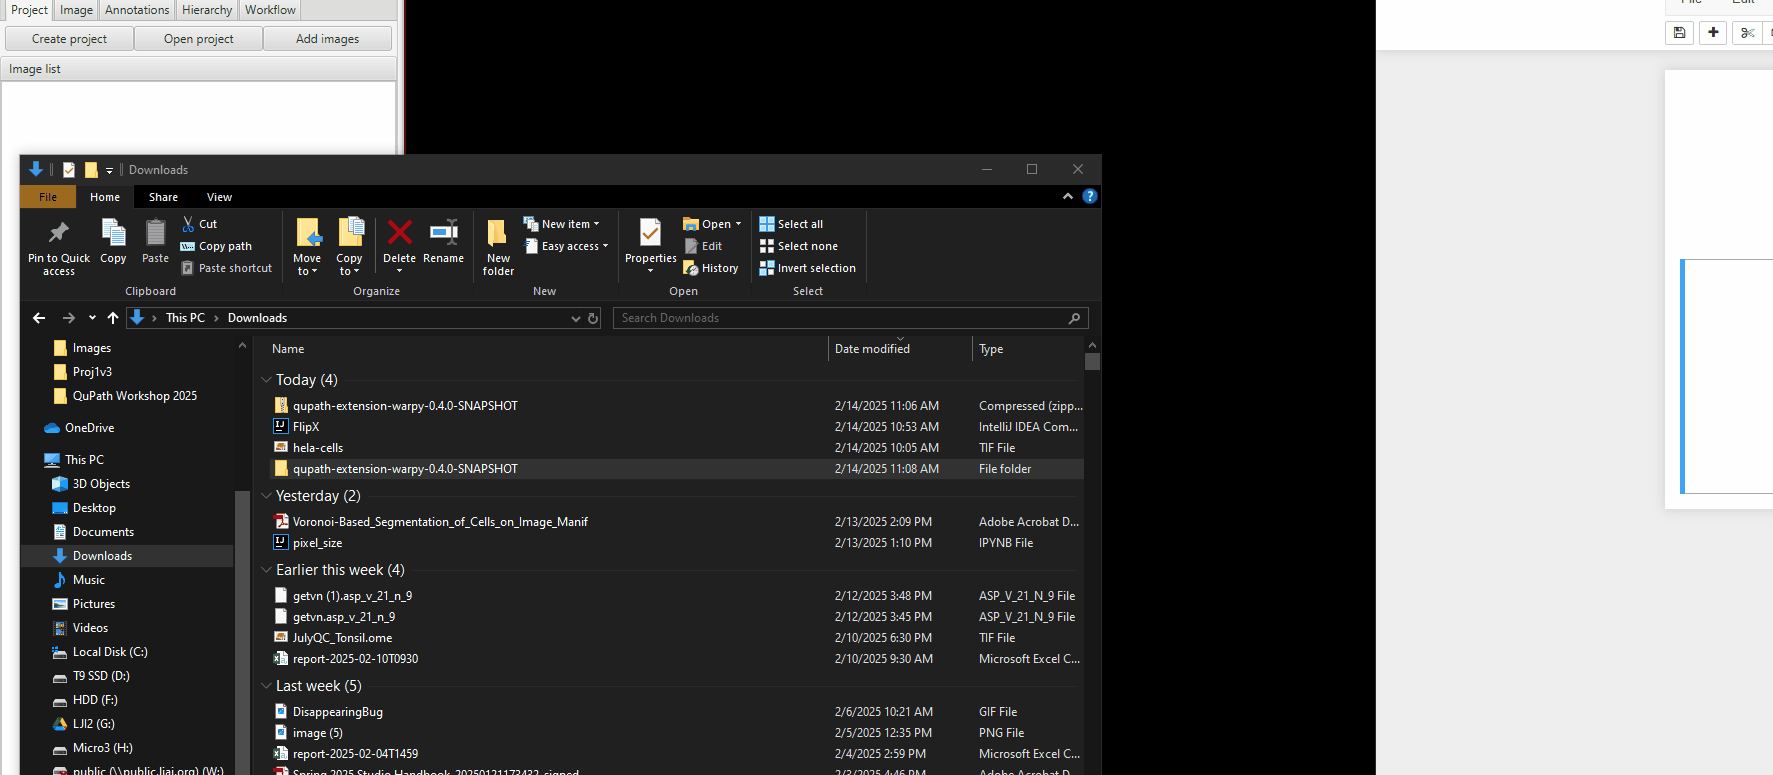
In your Downloads folder, unzip the folder. You will see a list of .jar files.
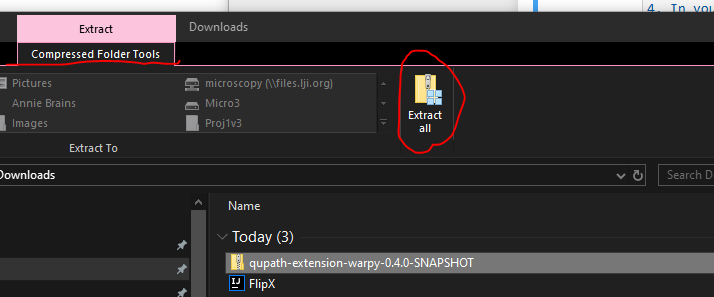
On Macs, simply double click the zip file.
Install the extension in QuPath#
Close any open QuPath windows and open a new one.
Open the unzipped Warpy 0.4.0 folder.
Drag all of the .jar files into the main QuPath window. If this is your first time installing an extension, it will ask you where you want the user directory for extensions to be saved. Click Use default
Restart QuPath.
There should now be 2 new menu options that weren’t there before. Check that these exist.
Analyze > Interactive Image Combiner WarpyExtensions > Warpy
2. Preparing the project#
Start a brand new project:
Create a blank folder named “Project 2”
Drag it into QuPath. Click Yes to create the new project.
Drag in 2 images: Tonsil_flip.ome.tiff and Tonsil_HE.tif
Double click on Tonsil_HE to open.
Set the stain deconvolution. This is a way of telling QuPath how “purple” is hematoxylin and how “pink” is eosin:
Change the Image type. In the Image tab, double click on “Brightfield (H-DAB)”. Change this to “Brightfield (H&E)” and then hit Apply
Zoom in a small region containing nuclei, bright pink regions, and background.
Draw a square containing all 3 components
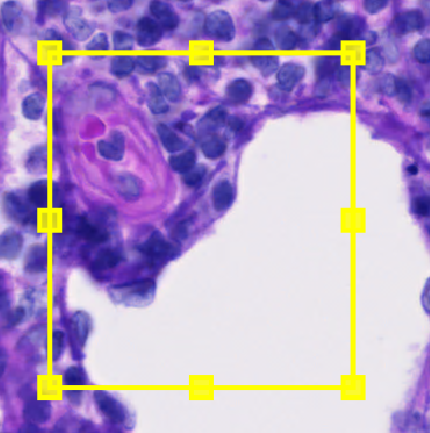
Analyze > Estimate stain vectorsWhen it asks if you want to use the Modal RGB values, click Yes
In the new window, change the “Max total OD” to 2. Then, click Auto, then click OK
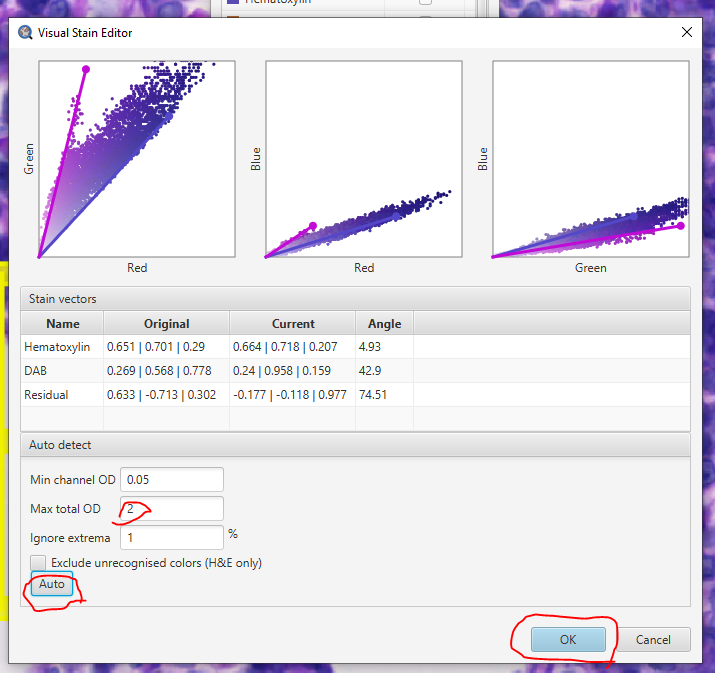
Keep the default name for the stain vectors, click OK
Delete the small box.
Right click on the image > Multi-view > Set grid size > Grid 1 x 2 (horizontal)Click on the new, blank viewer. There will be a very subtle red border around it to show it’s highlighted.
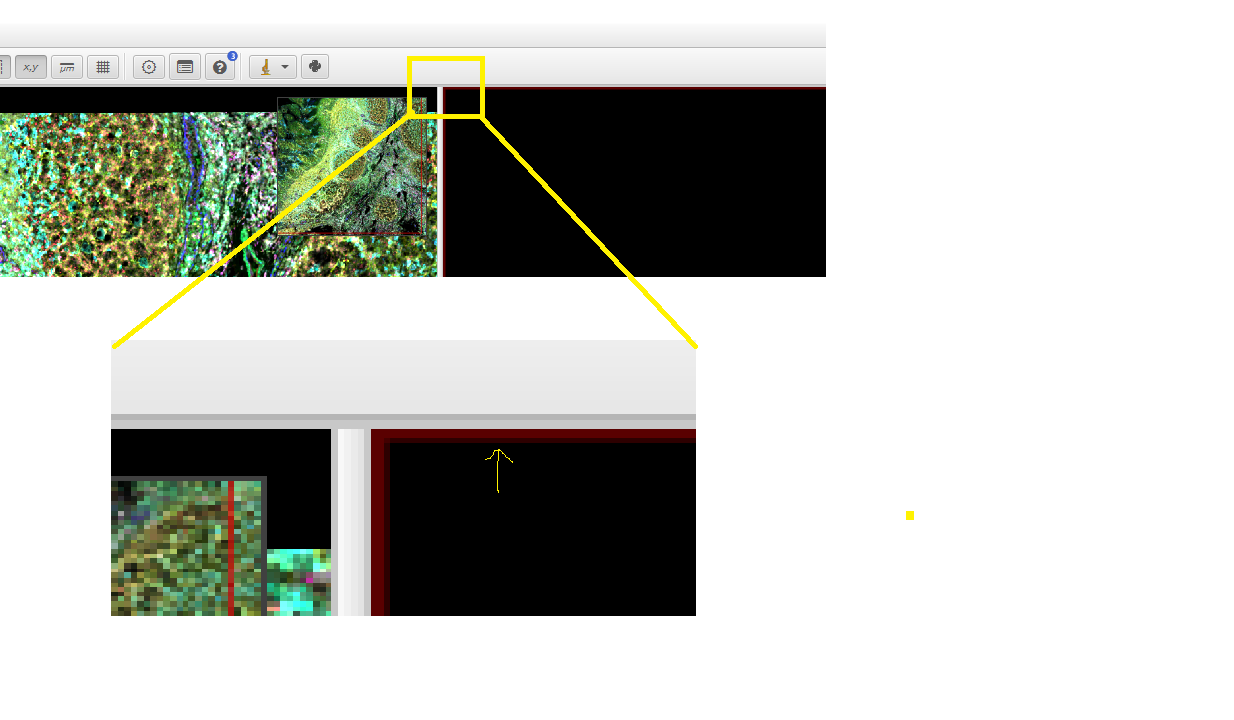
Open the Tonsil_flip fluorescence image inside the new viewer
Next change the display settings to be a “pseudo-HE”:
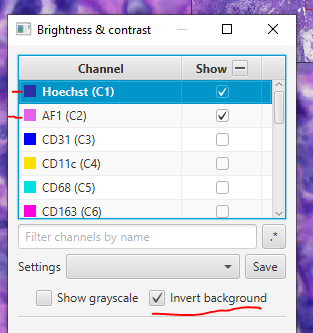
Turn off all channels except Hoechst and AF1
Click on the small colored box next to Hoechst. Dark mode + V0.6.0RC3 can introduce some interesting visual bugs if you have the channel selected, so if you are using dark mode try to click on the colored box without having the channel selected
Click on “Custom Color”
Find a purple that is close to the color of hematoxylin (just approximate). Click Save
Follow steps 2-4 for AF1, setting it to be similar to the pink of eosin.
Click Invert Background
Adjust the brightness of both channels until it looks a little like the HE next to it.
Save these display settings as “PseudoHE”
Amaze your pathologist coworkers!
Save both images!
3. Using Interactive Image Combiner#
Click on the Tonsil_flip fluorescence image.
Open the Interactive Image Combiner:
Analyze > Interactive Image Combiner WarpyTonsil_flip.ome.tif will already be displayed in the window. Load Tonsil_HE
Click “Choose images from project”
Select Tonsil_HE.ome.tif
Click OK
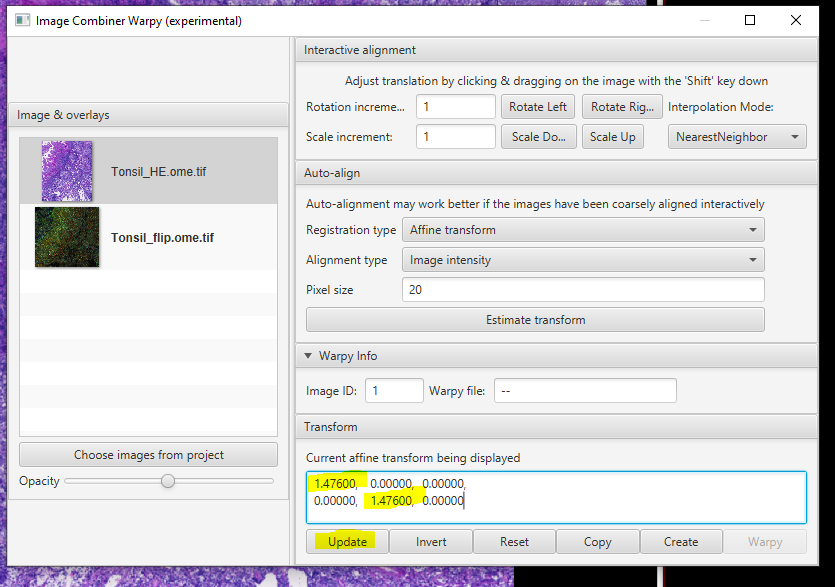
Select Tonsil_HE in the Image Combiner Window. Adjust the Opacity slider to 50% see both overlaid (poorly)
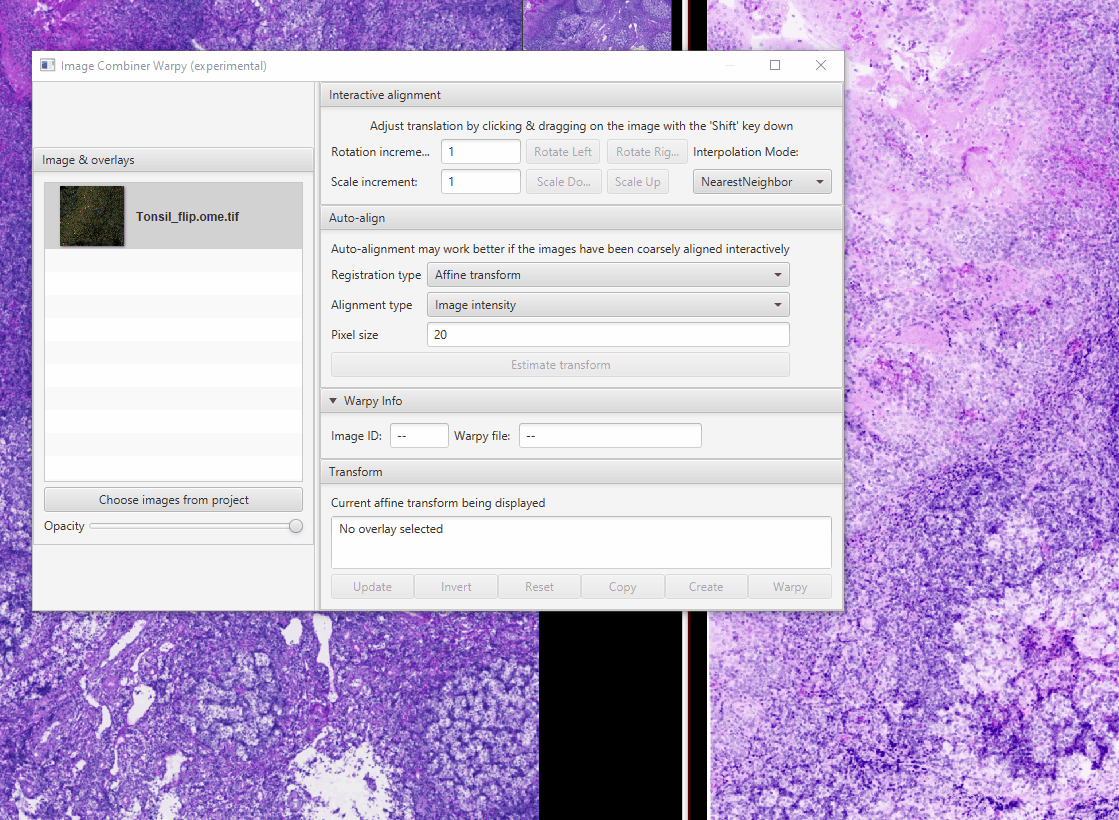
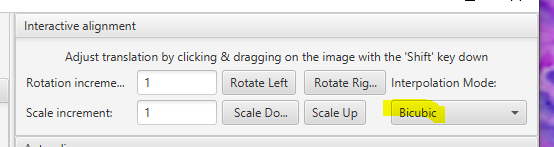
Because the fluorescence and brightfield images have different pixel sizes, we need to adjust the scale. The proper scaling factor is the ratio of the two pixel sizes: \(0.325 / 0.2202 = 1.476\) Replace the 1s with this value in the matrix at the bottom of the window then click Update
Hold Shift. Drag around the “moving” image (larger, true HE) until they are approximately aligned.
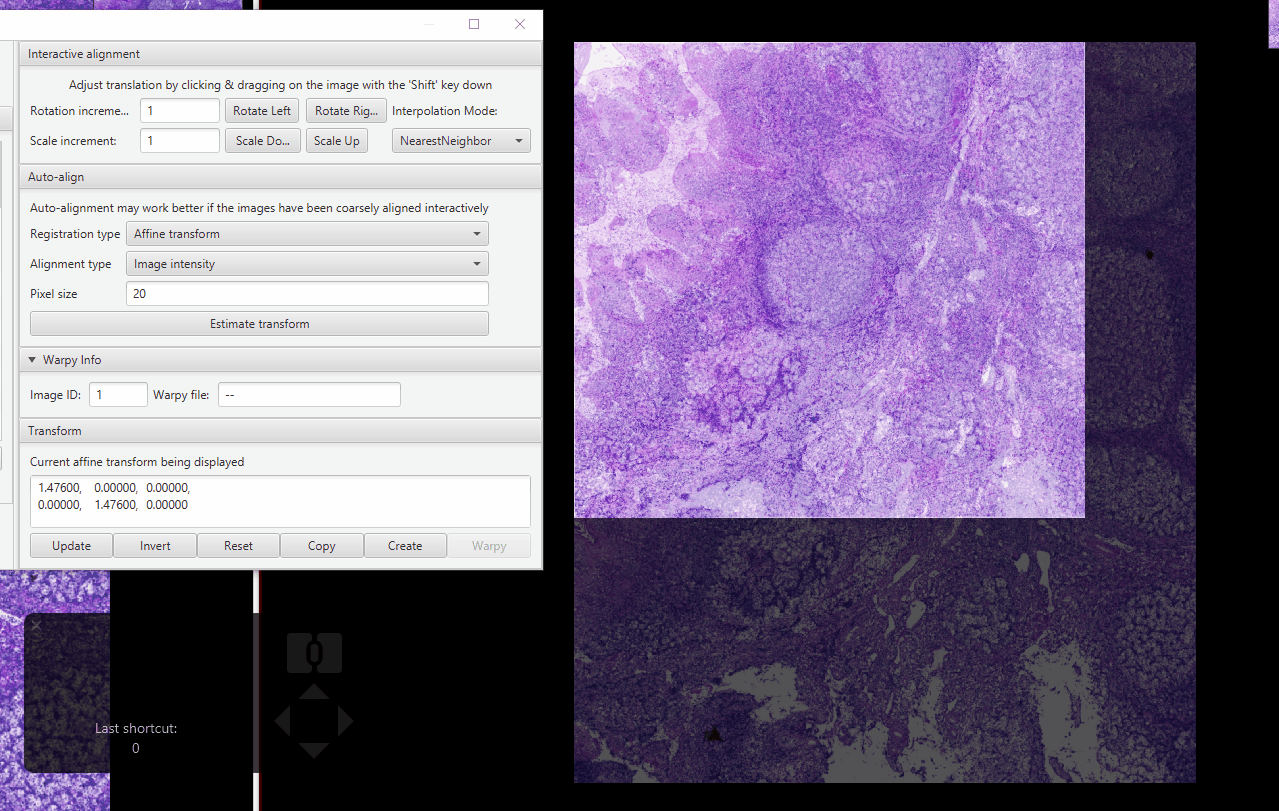
Zoom in on an area with distinctive features (I like using tissue gaps). Fix the alignment as best as you can.
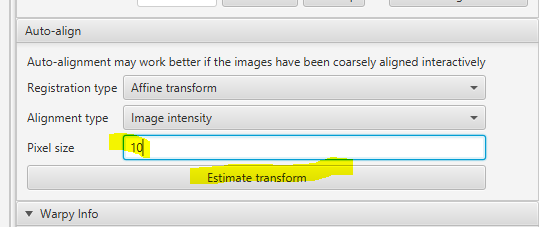
In the Image Combiner Warpy window, change the pixel size to 10. Press Estimate transform
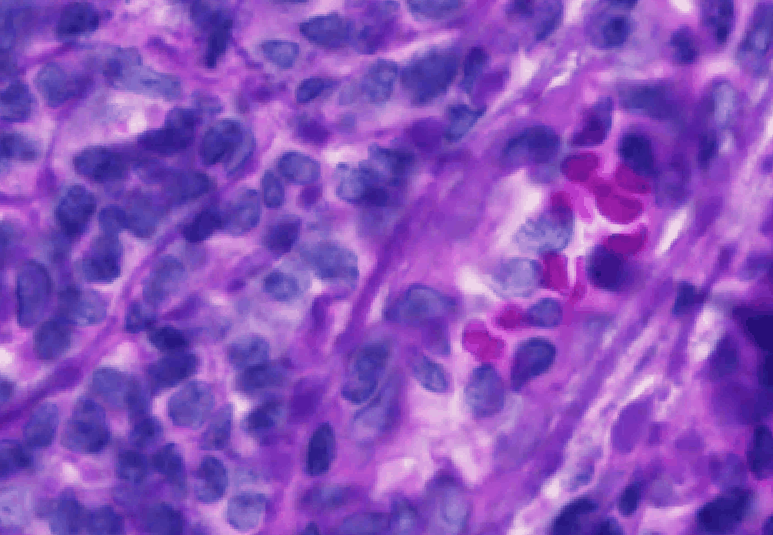
Zoom in on an area with a few nuclei. Hold Shift, adjust the alignment as best as possible.
Change the pixel size to 2. Press Estimate transform.
Adjust the opacity slider to observe the results.
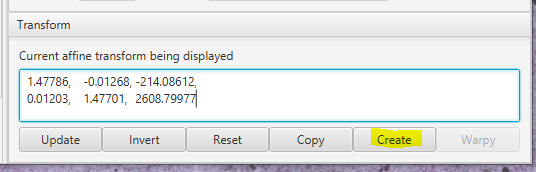
If your computer can handle it, change the pixel size to 1 um and estimate the transform again. This takes ~2 min on my large desktop, might be impossible on a laptop (Apple M1 may be able to do this in less than a minute). If your computer cannot do the estimate in a reasonable time frame, you can copy this and paste it directly into the matrix text box, then hit Update:
1.47786, 	 -0.01268,	 -214.08612,
0.01203,	 1.47701,	 2608.79977
Whichever transform matrix you end up using, I highly recommend copy-pasting it to a text file and saving it. This can be very helpful later for reporting results, swapping which image moves, or transferring objects from one to another.
Here are the results of using 0.5 um resolution:
Click on the fluorescence image (should be in the right viewer).
In the Brightness & Contrast window, turn on all channels (it’s OK that it’s too bright!)
In the Combiner window, switch the Interpolation mode to “Bicubic”
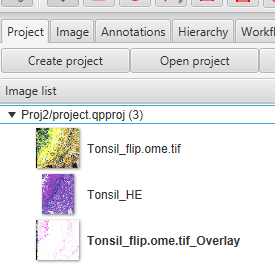
Click Create. When it asks you to add an image, click Yes.
It will add a new image in your Project tab, which is automatically opened (might look black).
Visualizing the Overlay#
Close the HE image (on the left).
Right click on it > Multi-view > Close viewer.Remove the now empty viewer.
Right click on the Overlay image > Multi-view > Set grid size > Grid 1 x 1 (single viewer)Turn off all channels except “Tonsil_flip.ome.tif-Hoechst” and “Tonsil_HE-Hematoxylin”. Put these two in contrasting colors. Get a visual assessment of how “good” the overlay is.
You can probably match most nuclei across images, but there will be some that don’t match well and some that are misaligned.
You also lose resolution in the HE image, because the new pixel size is 0.325. If you had switched which image was the “base”, you would not have gained resolution. QuPath would interpolate between fluorescence pixels to match the pixel sizes, but it cannot create information that wasn’t in the original image.
This new project entry does not duplicate the large image files! It is reading both .ome.tif files simultaneously and applying the transform on-the-fly. Simply viewing the image is memory intensity (but not storage intensive). If you intend to do any deep processing on this image, I recommend you save it as an .ome.tif in its own right.
File > Export images > OME-TIFFGive it a name and pick a pyramid value of 4.
Wait until it says it’s done (slow! Check your resource monitor)
Load the newly created file into QuPath and do all work on that one.
For the rest of this workshop, we will use the fluorescence only image, so there is no reason to duplicate the data now.